Most owners love their pets very much, and some, especially girls and women, also strive to somehow additionally decorate their kitten. For example, a haircut, a bow on the tail or a decorative collar.
Many cat owners are looking for beautiful collars for them in pet stores, and needlewomen prefer to make some kind of cat decoration with their own hands. In general, a cat does not need a collar, the exception being a flea collar for animals that go outside. However, it is so nice to see your pet in a new outfit.
Why do you need a collar?
Many cats do not walk outside, then the question arises: why does she need a collar? After all, this is not a dog. But not only those animals that go outside wear a collar. It all depends on the purpose of the collar.
Most cat collars are designed for beauty purposes and are used as accessories. Some may have contact information about the owners, so that if lost, kind people can find you and return your pet to you. This technique is often used by owners of purebred and expensive cats.
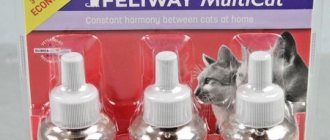
Another option is anti-parasite collars. They are worn by animals for medicinal or preventive purposes. Such collars are not made at home, but are purchased in specialized veterinary stores.
Therefore, making a cat collar with your own hands will differ depending on the purpose for which you will use this device.
For furry and restless travelers
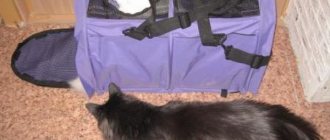
A device for a car where a dog is transported.
It often happens that a dog behaves too active or restless while traveling by car, which distracts the driver from driving. This problem can be solved quite simply. It is enough to fasten the leash between the seat belts and fasten the collar to it. The leash can also be secured between the passenger handles located above the rear windows.
Which material to choose?
The collar implies its constant use, that is, your pet will be wearing it all the time. Therefore, the choice of material must be taken seriously. First of all, it must be safe for the animal. Good for this:
- leather;
- thick fabric;
- ribbons;
- rubber bands.
If you want to use accessories to make a cat collar with your own hands, then when choosing them you need to be guided by the fact that they should be light and durable. You can use light metal, plastic or silicone.
The collar clasps should also be strong and secure. For this purpose, buttons, Velcro or strap fasteners will do.
What is a harness
A cat harness is a device that is attached to the animal's neck and back and connected to a leash. Straps are important because it is dangerous to tie a leash to a cat's collar. Unlike dogs, cats have a soft throat, and too much pressure on the throat area can cause internal injury or suffocation.
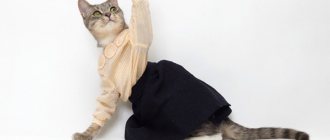
The cat feels great in a harness
Types of harnesses:
- H-shaped. They have a short strap that lies between the shoulder blades with loops sewn to both ends. The upper loop is smaller and is attached around the animal’s neck, the second is larger and clasps the body under the front legs;
- eights. Identical to H-shaped harnesses: they have a short top loop and a large bottom loop. The only difference is that there is no straight belt between them; in the figure eight they are connected to each other by a small jumper, externally forming the number 8;
- vests. Shaped like the letter H using durable fabric. They are attached to the neck and body under the front legs of the animal;
- V-shaped ones have 2 loops that are attached behind the cat’s front legs, on the neck and torso. The loops are connected by a long strap that runs across the cat's chest. From the front, the harness looks like a V.
Difference between a harness and a collar
The main difference when comparing harnesses to collars is that they reduce the risk of neck injury. They also cause fewer restrictions for breeds that are prone to breathing problems or tracheal collapse.
Important! Collars are attached to the neck, which can cause suffocation of the animal in certain situations, while a harness for a kitten or cat, due to several belts, distributes the load over the back and chest.
Sew a collar for a cat
Before you decide how to sew a cat collar with your own hands, you need to decide on the dimensions. It is important that the collar fits tightly to the cat's neck, but does not choke it! A collar that dangles loosely is also not suitable, since the animal can easily get rid of it or lose it.
So, take a soft meter (the kind your grandmother or mother probably used) and grab the cat's neck without squeezing it. We will sew the accessory using these dimensions.
Next, having decided on the type of fastener, we make a pattern. It will be in the shape of a rectangle of the width you need. Also remember to leave 15cm free end and seam allowance. Here it is necessary to take into account that the coarser the material for the collar, the more allowances will have to be left.
It should be noted that when choosing a material, you need to take into account its lack of odor. A strong and unpleasant smell can scare away a cat.
Then we stitch the entire collar around the perimeter on one side and turn it inside out to the other side. Next, we sew on the fastener and, if necessary, process the holes so that they do not fray. Now all that remains is to present your creation to your ward.
How to train a cat to wear a harness
Not all cats are going to tolerate a harness right away, especially Scottish breeds. There are methods you can use to teach your cat to wear it. If they don't work or your cat is stressed by it, you should stop and consult your veterinarian before continuing to train her.
- Let the cat recognize the harness. You need to put it nearby and allow the cat to independently become interested in the new object and sniff it. You can give her a treat while she does this. You should associate positive things (like treats) with the harness to make her less afraid.
- You need to put the harness on the cat, but do not fasten it. You should pet her and encourage her with gentle words to keep her in a good mood. This should be done several times.
- After she gets used to feeling something on her back, you need to put on a belt and connect the parts with Velcro while praising her. Some cats may just walk around as if nothing is wrong, others may try to fight with the harness or pretend they can't move. You should leave the belt on for a while. Repeat this several times, increasing the time the cat stays in the harness.
- When the owner feels that the cat is ready, you can attach a leash, go outside with her and let her walk.
Collar with medallion
This accessory option will be more expensive both in terms of finances and time. In order to make a DIY cat collar with a medallion, we will need:
- thick steel plate;
- blank for medallion;
- cores with letters or numbers (depending on the inscription);
- hammer;
- masking tape;
- a steel ring on which the medallion will hang;
- favorite cat collar;
- permanent marker (optional).
Here a ready-made collar is used, but the name medallion is made by hand. So, we fix the blank for the medallion with masking tape on the steel plate so that there is space left for the inscription.
Next we mint the inscription. After making sure that the inscription will fit in width on the medallion, we place the core with the middle element of the inscription in the center of the workpiece. We hit the core several times with a hammer. We do the same with the remaining letters.
You can write out the cat's name, residential address or mobile number. The inscription can also be made on both sides of the workpiece.
Next, we paint over the inscription with a permanent marker to make it easier to read. We drill a hole on the medallion with a thin drill, thread a ring through it and hang it on the collar. The collar with a name medallion for your fashionista is ready.
Instructions for making a collar for a cat with your own hands
A collar with a name tag will help you find your pet if it goes missing. To make it, you will need the following devices and materials:
- old belt with buckle;
- blank for a medallion with a loop (if there is no loop, it will have to be drilled);
- a tight ring, preferably made of steel;
- steel plate;
- mounting tape;
- pencil;
- hammer;
- permanent marker;
- alcohol;
- bits with the required letters and numbers.
You can adjust the belt to the circumference of your pet’s neck yourself or seek help from a tailor or shoe shop. The blank for the medallion must be secured to the plate in such a way that there is free space in the center for the letters. The middle of the token should be marked with a pencil, focusing on the straight edges of the mounting tape.
Then you need to put the bat in the middle and carefully hit the top with a hammer several times. To prevent the letters from blending into the background, they should be covered with a marker, having previously degreased the surface with alcohol. Once the medallion is ready, it must be attached to the ring and secured to the strap.
On the medallion you can place the cat's name, phone number and address of its owner. In this case, it is advisable to place the animal’s name on the front and information about its owner on the back. It is recommended to remove the collar periodically to prevent creases from forming on your pet’s fur.
The simplest collar option for cats with free access to the outdoors is a product made from a nylon sling. To make it at home you will need to take the following materials:
- nylon sling;
- colored ribbon with ornament;
- plastic clasp and buckle;
- half ring
First you need to use a sewing machine to sew the tape to the sling (stitch length - 2 mm).
Then you need to attach the fastener by unfastening it and threading it through one of the elements of the end of the sling. It needs to be folded and sewn to the base of the collar at the fold.
The free end must be threaded through the ring, moving it closer to the beginning. Then it needs to be stitched again across the sling, using the material that was threaded through the fastener to secure the half ring.
The other side of the product must be threaded through the buckle and the second part of the fastener must be secured at the end, bending the sling a little more than last time.
Then the end of the sling needs to be slightly bent back and stitched across to secure the buckle.
- From the prepared piece of fabric we form 3 blanks.
The size of the parts is shown in the picture. The longest part from which the collar will be made should be equal in length to the circumference of the animal’s neck, so you need to take measurements in advance. Please note that the butterfly collar should not put pressure on the cat's neck. Blanks for needlework - Let's start creating the butterfly itself.
To do this, fold the edges of the largest rectangle towards the center and iron its fold lines. The workpiece should take the shape you need. Working on a large rectangle - We repeat the same steps with a small rectangle measuring 5x7 cm.
- We fold both parts horizontally in half and make a seam at a distance of 5 mm from the edge.
We use a sewing machine - We turn the pieces inside out so that the seam remains hidden from the inside.
We thread the larger piece through the smaller one. The butterfly is ready. Finalizing the butterfly - Let's move on to creating the collar itself.
Fold the elongated third rectangle, smoothing its edges towards the center. We sew Velcro to the ends of the collar. We make the seam vertical. We form the collar for the cat itself - Carefully thread the collar through the ring of our butterfly.
Putting the details of our work together
A charming fabric butterfly collar will become a worthy accessory for your pet. An elegant decoration will come in handy on holidays or special occasions.
Spiked Collar
In this option, a silicone wrist bracelet is used as the basis for the collar. This is convenient because you don’t have to worry about attaching fasteners. In addition, silicone stretches well. But you should keep in mind that such an accessory is not suitable for large and well-fed cats.
So, we take the decorative spikes and, using a needle and thread, firmly grab them to the bracelet. You can leave the interval between them as you wish, but we suggest approximately 2-3 cm. The brutal accessory for your cat is ready.
There are many more options that you can use when making a cat collar with your own hands. For example, you can use the Shambhala technique and weave a collar from strong threads or thin strips of leather.
Braided collar pattern
For advanced needlewomen, it will not be difficult to knit or crochet a collar or weave it using the macrame technique. Embroidery would also be appropriate here. In addition, the pattern can be completely different. It could even be the name of your pet, place of residence, or a contact phone number that can be used in the event of a loss of the animal.
You see in the photo a DIY cat collar using the macrame technique, which is used for weaving bracelets and belts.
The technology of weaving baubles is also popular. This accessory will undoubtedly please your ward.
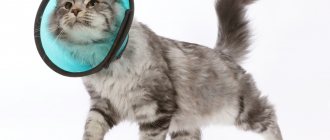
Postoperative collar
Sometimes a collar has to be put on a cat not for aesthetic reasons, but out of necessity. These collars are called veterinary collars. Often they are simply purchased at veterinary pharmacies. However, you can make a post-op collar for your cat with your own hands. We will present an option for making a protective Elizabethan collar.
To do this, we must take two measurements: the girth of the cat’s neck and the length from the neck to the tip of the nose + 5 cm. Next, we make a pattern in the form of half a bagel: the inner small circle is the girth of the cat’s neck, and the outer large one will be at a distance of the width of the collar and repeat the shape internal.
For manufacturing we will need any fabric and dense material such as plastic. We cut out one pattern from plastic and two patterns from fabric (with seam allowance). We sew one edge of the fabric patterns, insert the plastic pattern and sew the bottom edge of the fabric pattern. The edging can be made from a strip of any fabric.
For greater comfort for your pet, you can insert a layer of foam rubber into the inside of the collar, the same size as the plastic pattern.
Velcro is sewn on both ends of the steering wheel. Or you can use lacing. The protective Elizabethan collar is ready. Your cat will feel comfortable, soft and comfortable in it, and most importantly, safe.
As you can see, there are now countless techniques for making DIY cat collars with step-by-step instructions. All you have to do is choose the most suitable option and bring it to life.
How to properly put a harness on a cat
After you have selected the most comfortable harness, you need to follow the step-by-step recommendations on how to put a new item on your animal. Dressing methods differ depending on the type of harness used.
- You need to figure out how the figure eight harness should fit on the cat. The smaller loop will slide over the cat's head and does not need to be undone. The large loop should go around the cat's chest and be undone.
- Thread the animal's head through the small loop. The place where the loop connects to the connecting strap should be just above the cat's shoulders. Using a small loop above the cat's head, you need to move the strap so that the middle of the figure eight lies on the back between the shoulder blades.
- Connect a large loop around the cat's body. You need to take the ends of the larger loop and draw them under the chest. Check for kinks and straighten them, then fasten the buckle.
- If the loop is too small to fit on your cat's chest, you will need to increase the length slightly using the sliding adjustment on the harness.
- Check the fit of the straps: 2-3 fingers should fit between the harness and the cat.
Important! Adjustments should be used to lengthen or shorten the loops so the cat feels comfortable and secure.
Cat in eight
- Find the short strap (rear) and hold it. Place the cat's head through the smaller loop. Lower the straight strap to the cat's shoulder blades. Unfasten the large loop and wrap both ends around the animal’s body under the front paws. Fasten the loop.
- Observe the main condition: the harness should fit snugly, but be loose enough so that you can insert 2-3 fingers between it and the cat. When putting it on for the first time, it is worth adjusting the size to fit the cat.
Cat in an H-harness
- Unfasten the Velcro on the vest and place it so that the upper part is on the neck and the lower part is under the front paws. Fasten the Velcro under the cat's neck and belly.
- If the animal is cramped, adjust the pressure using Velcro.
- Lay the device on the floor, spreading the loops for the cat's paws as far apart as possible.
- Place the cat over it so that its paws are in the side loops.
- Raise the harness and close the clasp on the animal's back.
Cat in a V-harness